Username and password #
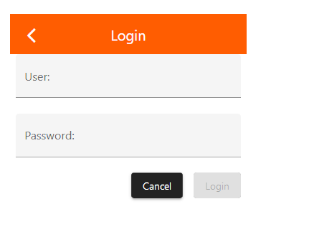
When accessing the pairing or setting settings for the first time, you will be asked for a user and password. These can be found on the product label on the back of the SMARTplayer. You can then switch back and forth between the tabs until you close it.
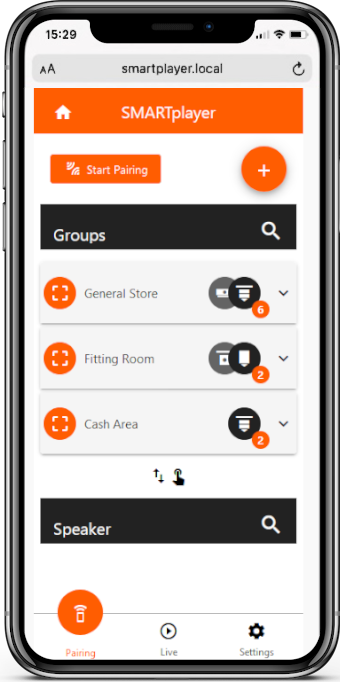
Start Pairing #

Make sure that the speakers are supplied by electricity and are emitting a search tone at regular intervals. Click on “Start Pairing”. The corresponding number of all speakers found is displayed. Once the speakers are found, stop the process. These are now displayed under “Speaker” with the corresponding model name and reception strength of the radio signal.
Create Groups #

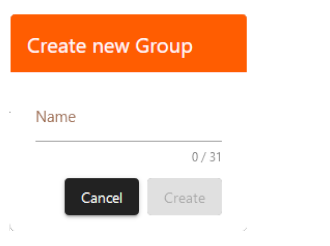
By “Groups” we intend volume groups. The volume of all loudspeakers in a group can then be turned up or down as a whole using a volume control without affecting the volume of other groups or loudspeakers. With “+” you can create as many groups as you want and name them, such as entrance, cash desk, reception, changing room, etc. and then assign each speaker.
Speaker #
You can now see the coupled speakers and click them individually and not only assign them to the desired group, but also change a number of other settings.
Identify #
![]()
If you are not sure which loudspeaker is which, you can click on Identify and the selected loudspeaker will emit an identification tone. In case you have speakers with milky cover caps, you will also see an LED light up. The command is carried out until you click the command again.
Mute Icon #

The loudspeaker is muted by clicking on the mute icon. This command is carried out until the command is clicked again or the loudspeaker is restarted (when power supply is interrupted).
 Mute function is now active
Signal Status (connectivity) #
The strength of the received radio signal is displayed by means of waves.
![]()
![]()
![]()
Name #

To name an individual speaker, enter the name you want and confirm your entry with the tick.
Group #

Select the volume group you want to assign the speaker to.
Gain #

The volume of the individual loudspeaker can be adjusted using the gain. For speakers with milky cover caps, this can also be done using the remote control. The software automatically registers the changes.
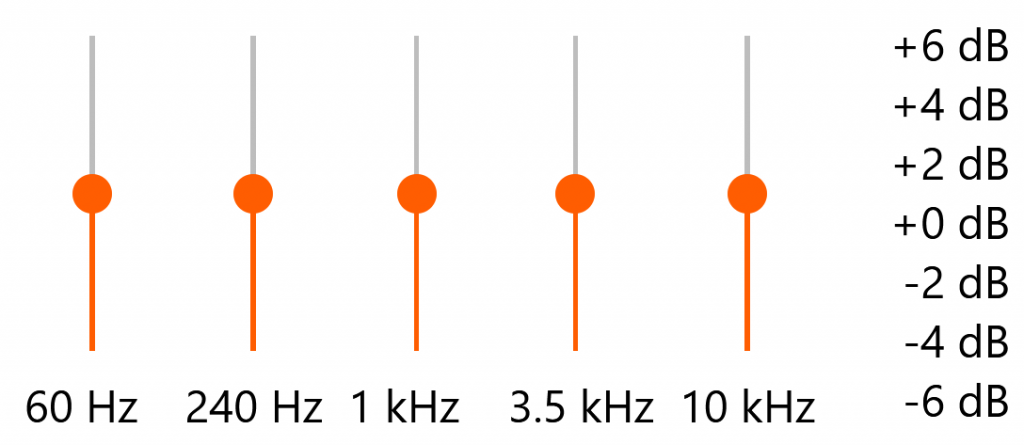
EQ Preset #

The best Equalizer settings are already ideally matched to the speaker model and are displayed as “flat”. You can change from our preconfigured sound images “Bass Boost”, “Dance”, “Jazz”, “Lounge”, “Pop”, “Rock” and “Voice” and can also adapt the sound image to your needs.
Remove from group #

By clicking “Remove from Group” the speaker from the group will be removed and reappears under Pairing – Speaker. You can reassign it to another group or move the loudspeaker from one group to another by changing the group in the “Group” field.
Advanced #
Type #
Speaker model name
Serial number #
Unique serial number of the speaker
Firmware
Currently installed firmware
Firmware update #
Firmware updates are usually installed OTA (over the air) and the corresponding file is transmitted from the SMARTplayer via radio. Only in special cases a file should be installed on a single loudspeaker via PC.
Restart #

The speaker will restart. All settings are retained.
Unpair #

The speaker is uncoupled from the transmitter (SMARTplayer) and retains its basic settings and name.
Reset #

The loudspeaker is uncoupled from the transmitter (SMARTplayer) and all settings are reset to the delivery status. The loudspeaker begins to emit the recognition tone again and is ready to been re-paired.